Introducing Pipelines Into Your Network Automation
Lets bring your Ansible playbook changes and testing to the next level with GIT Pipelines. Pipelines allow for more advanced testing and changes and adds a gui interface which some may find much easier than manually running Ansible playbooks. Having your playbooks and code hosted on a GIT platform also enables code revision and team reviews/approvals.
The Ansible setup
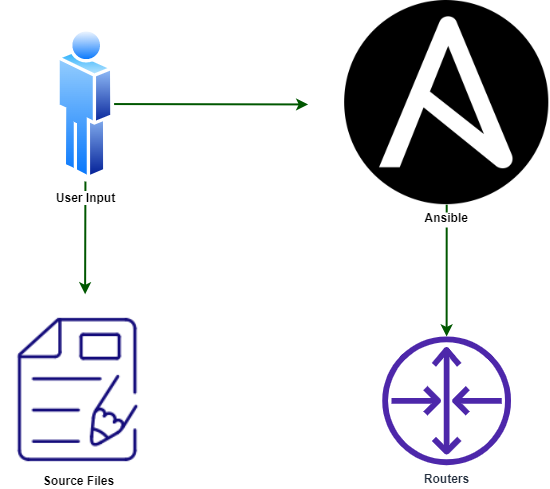
For this tutorial we will start with a simple Ansible structure of generating config from templates and applying that to network devices. Below shows how you would normally run Ansible, the user would update source files and host vars then manually run the Ansible playbooks:

While Ansible is a great tool this still is quite a manual process. After updating the relevant files you still need to run each playbook and view the output of each task to confirm all ok. You also have no easy way of having a colleague review your changes before they are implemented which in most businesses is an absolute requirement.
Below is the basic workings of my Ansible playbook which we will use and build upon. You can take a look at the source code on my Gitlab Account. Please note the repo is split into different branches showing the different stages we will touch on.
jamisons@unraid-ubuntu:~/network_iac$ ansible-playbook main.yml --tags precheck

TASK [Generate tacacs configuration] **************************************************************
ok: [vSRX-RTR01]

TASK [Commit check config and generate diff] ******************************************************
changed: [vSRX-RTR01]

TASK [Display "show | compare" output] ************************************************************
ok: [vSRX-RTR01] => {
    "diff_output.diff_lines": [
        "",
        "[edit system tacplus-server]",
        "+   172.16.16.10 {",
        "+       secret \"$9$0CIGq.5/9p\"; ## SECRET-DATA",
        "+       single-connection;",
        "+       source-address 192.168.178.179;",
        "+   }",
        "+   172.16.16.11 {",
        "+       secret \"$9$0CIGq.5/9p\"; ## SECRET-DATA",
        "+       single-connection;",
        "+       source-address 192.168.178.179;",
        "+   }",
        "-   172.16.100.10 secret \"$9$0CIGq.5/9p\"; ## SECRET-DATA",
    ]
}

PLAY RECAP ****************************************************************************************
vSRX-RTR01  : ok=5    changed=1    unreachable=0    failed=0    skipped=0    rescued=0    ignored=0

Playbook run took 0 days, 0 hours, 0 minutes, 4 seconds
TASK [Generate tacacs configuration]Using Jinja templates, host and group vars we will generate configuration for the routerTASK [Commit check config and generate diff]Apply the configuration change to the deviceTASK [Display "show | compare" output]Display the output of the previous task which shows us what changed
The above works great and using the "precheck" and "deploy" tags I can test and deploy changes easy as. In the real world though we need proper testing, peer review of my changes and an easy way to look at all past changes (and who did them!). Enter Gitlab pipelines.
The pipeline
To follow on with the below, please have the below set up and ready:
- Your own instance of Gitlab - docker is the quickest and simplest method
- Gitlab runner installed
- Gitlab runner registered to your Gitlab instance
- Add your Ansible repository into your Gitlab instance
Now we are ready lets start with the most important part of the pipeline, the .gitlab-ci.yml file. With this file we can define jobs to run, images to build and heaps more. As an intial test lets put the following into our .gitlab-ci.yml file:
---
image: jamisons/ubuntu-20-04:v1

variables:
  ANSIBLE_CONFIG: $CI_PROJECT_DIR/ansible.cfg

before_script:
  - ansible-galaxy install juniper.junos

stages:
  - precheck

test_configuration:
  stage: precheck
  script:
    - ansible-playbook main.yml --tags precheck
The first line defines an image that we will download from docker-hub to run our playbooks, here I have created my own image called jamisons/ubuntu-20-04:v1. It is based on Ubuntu 20.04 and has Ansible installed as well as a number of python modules handy for Juniper automation. See here on how to make up your own image or feel free to use my one.
The following code defines variables we want to import into the active pipeline, in this case we want to tell docker the "ANSIBLE_CONFIG" variables can be found in our project directory:
variables:
  ANSIBLE_CONFIG: $CI_PROJECT_DIR/ansible.cfg
Third in the list we have before_script. This allows us to list a number of commands to run before we start the actual job which are run inside the container, in this case they would need to be commands you could normally run on a Ubuntu machine. Here we are using ansible-galaxy to install the juniper.junos role into my ubuntu container.
before_script:
  - ansible-galaxy install juniper.junos
Fourth we have defined the stages in the pipeline. These group each job you may run, for example you may have a stage called "test" that you then have three jobs that each run a specific kind of test. Within Gitlab you can then configure why and when you might want to run this stage that includes those sets of jobs.
stages:
  - precheck
Last but not least we have the jobs! We can name them however we wish and they contain the meat of the pipeline. The single job I have here is called test_configuration and has been assigned to the precheck stage. For a job to run it requires minimum a script and thats where I have my Ansible command.
test_configuration:
  stage: precheck
  script:
    - ansible-playbook main.yml --tags precheck
There are a multitude of other options and configurations we can add to the gitlab-ci.yml file but lets give this a try and see how it performs!
The first pipeline run
Once you load the gitlab-ci.yml into your repository it will immediately enable some default actions. You will have the option of manually running the pipeline: *** screenshot of pipeline job run button By default the pipelines will also run when you commit, check out rules to change when or why a pipeline will trigger. Lets hit the run button!
